Friday, July 29, 2011

Weird Leaf in Box?

Gongura, red sorrel leaves, ambad bhaji, ambada


This a great new item that I know you most likely have not tried. It is very tangy and could be described as having a citrus flavor. They are very popular in India and are grown @ Bass Farms for you:) They are a fun plant to grow; they grow like little trees and when you pick them you simply cut them at the bottom. The really amazing part is that it grow's right back. Multiple Times. Not Uncommon for veggies to grow back, but we hack these things at ground level.


Hope you Enjoy


Thz Chris 


P.S. I should of added once again that it is the leaf that is edible.


Wednesday, July 27, 2011

Baking Zuc, what is that?

Basically this is a zuc that has been on the plant longer and get's huge. They are excellent to stuff and utilize in the kitchen for bread's and other purposes. There will be one in the box. Zucchini are also another great vegetable because they are so versatile in the kitchen. Enjoy.

Thz Chris

C.S.A. Week 8

This week's box look's good. Their is many items in the box.

I don't know exact quantity this week, the boxes are full though. So 

Cabbage- Last week of the Cabbage, Yay!!!!!
Baking Zuc
Cucumber 
Premium Green Pepper
Summer Squash
Green Beans
Gongura Leaves, they are an extreme delicacy. I don't think you can find them anywhere else. So Enjoy this item. They are awesome in a roast or with eggs. They can be used basically like any other herb. They are extremely flavorful. Chew on a small bit of the leaf to get a sense of the wonderful flavor. I will not tell you how it tastes, you have to give it a fair chance yourself. They are stored best between two moist paper-towels in the fridge. They don't last long so utilize while you have them. 

Thz Chris 

Monday, July 25, 2011

REPOST, VERY INFORMATIVE!! STORAGE TIPS

All stored produce should be checked regularly for signs of spoilage such as mold and slime. If spoiled, toss it out. All cut, peeled or cooked vegetables or fruits should be stored in clean, covered containers in the refrigerator at 40F or less.
Fruit/Vegetable
Storage method/Tips/time

Apples
Room temperature: 1-2 days; refrigerator crisper: up to 1 month
Ripen apples at room temperature. Once ripe, store in plastic bags in the crisper. Wash before eating.

Asparagus
Refrigerator crisper: up to 3 days.
Once picked, asparagus loses quality quickly. Wrap the base of a bunch of asparagus with a moist paper towel, place in a plastic bag and store in the refrigerator. Wash before using.

Beans, green or yellow
Refrigerator crisper: up to 3 days
Store in plastic bags. Do not wash before storing. Wet beans will develop black spots and decay quickly. Wash before preparation.

Broccoli
Refrigerator crisper: 3 to 5 days
Store in loose, perforated plastic bags. Wash before using.

Beets, Carrots, Parsnips, Radish, Turnips
Refrigerator crisper: 1 to 2 weeks
Remove green tops and store vegetables in plastic bags. Trim the taproots from radishes before storing. Wash before using.

Berries (Blackberries, Raspberries, Strawberries, Blueberries)
Refrigerator crisper: 2-3 days
Before storing berries, remove any spoiled or crushed fruits. Store unwashed in plastic bags or containers. Do not remove green tops from strawberries before storing. Wash gently under cool running water before using.

Brussels sprouts
Refrigerator crisper: 1-2 days
The fresher the sprouts, the better the flavor. Remove outer leaves and store fresh sprouts in plastic bags. Wash before eating.

Cabbage
Refrigerator for up to 2 weeks.
Store, after removing outer leaves, in perforated plastic bags.

Chard
Refrigerator crisper: 2-3 days.
Store leaves in plastic bags. The stalks can be stored longer if separated from the leaves. Wash before using.

Collards
Refrigerator crisper: 4-5 days
Collards store better than most greens. Wrap leaves in moist paper towels and place in sealed plastic bag. When ready to use wash thoroughly. Greens tend to have dirt and grit clinging to the leaves.

Corn
Refrigerator crisper: 1 to 2 days
For best flavor, use corn immediately. Corn in husks can be stored in plastic bags for 1 to 2 days.

Cucumbers
Refrigerator crisper: up to 1 week
Wipe clean and store in plastic bags. Do not store with apples or tomatoes. Wash before using.Eggplant
Refrigerator: 1-2 days

Eggplants do not like cool temperatures so they do not store well. Harvest and use them immediately for best flavor. If you must store them, store in a plastic bag in the refrigerator. Be careful as it will soon develop soft brown spots and become bitter. Use while the stem and cap are still greenish and fresh-looking.
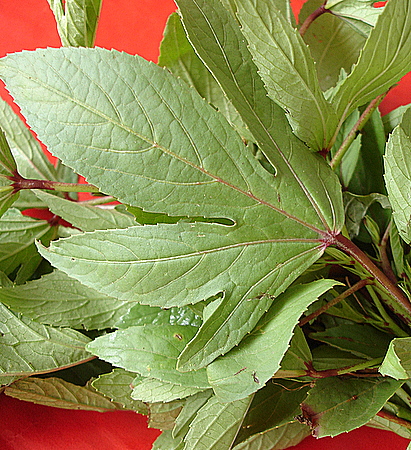
Herbs
Refrigerator crisper: 2 to 3 days
Herbs may be stored in plastic bags or place upright in a glass of water (stems down). Cover loosely with plastic bag.

Lettuce, spinach and other delicate greens
Refrigerator crisper: 5 to 7 days for lettuce; 1 to 2 days for greens
Discard outer or wilted leaves. Store in plastic bags in the refrigerator crisper. Wash before using.

Melons: Watermelon, Honeydew, Cantaloupe
At room temperature until ripe Refrigerator: 3 to 4 days for cut melon
For best flavor, store melons at room temperature until ripe. Store ripe, cut melon covered in the refrigerator. Wash rind before cutting.

Nectarines, Peaches, Pears
Refrigerator crisper: 5 days
Ripen the fruit at room temperature, and then refrigerate it in plastic bags. Wash before eating.

Onions ( Red, White, Yellow, Green)
Dry onions: Room temperature 2 to 4 weeks; green onions: Refrigerator crisper: 3 to 5 days
Store dry onions loosely in a mesh bag in a cool, dry well-ventilated place away from sunlight. Wash green onions carefully before eating.

Peas
Refrigerator: 2-3 days
The sugar in peas quickly begins to turn to starch even while under refrigeration, so eat quickly after harvesting. Store peas in perforated plastic bags. Wash before shelling.

Peppers
Refrigerator crisper: up to 2 weeks
Wipe clean and store in plastic bags. Wash before using.

Potatoes
Room temperature: 1 to 2 weeks
Store potatoes in a cool, dry, well-ventilated area away from light, which causes greening. Scrub well before cooking.
Summer squash, zucchini, patty pan
Refrigerator: 2-3 days
Wipe clean and store in plastic bags. Wash before eating.

Tomatoes
Room temperature; once cut, refrigerator crisper: 2 to 3 days
Fresh ripe tomatoes should not be stored in the refrigerator. Refrigeration makes them tasteless and mealy. Wipe clean and store tomatoes at room temperature away from sunlight. Wash before eating. (Refrigerate only extra-ripe tomatoes you want to keep from ripening any further.) Store cut tomatoes in the refrigerator.

Winter squashes, pumpkins
Room temperature for curing; then cool, dry storage area for 3 to 6 months.
Most winter squash benefits from a curing stage; the exceptions are acorn, sweet dumpling and delicata. Wipe clean before curing. Curing is simply holding the squash at room temperature (about 70 degrees) for 10 to 20 days.
After curing, transfer to a cool (45 to 50F), dry place such as the basement or garage for long term storage. Do not allow them to freeze. The large hard rind winter squash can be stored up to six months under these conditions. Warmer temperatures result in a shorter storage time. Refrigeration is too humid for whole squash, and they will deteriorate quickly.
The smaller acorn and butternut do not store as well, only up to 3 months. Store cut pieces of winter squash in the refrigerator.

References:
http://www.urbanext.uiuc.edu/veggies/index.html Watch Your Garden Grow: A guide to growing, storing and preparing vegetables, University of Illinois Extension
http://www.extension.umn.edu/distribution/horticulture/DG1424.html Tong, Cindy, Harvesting and Storing Home Garden Vegetables, University of Minnesota Extension Service
http://fruitandvegetablesafety.tamu.edu/Consumers/Safe_Food_Storage.pdf Van Laanen, Peggy and Amanda Scott, Safe Storage of Fresh Fruits and Vegetables, Texas Cooperative Extension System, Texas A&M University System.

Wednesday, July 20, 2011

Crispy Baked Zucchini Fries

This is great, I am glad these continue to fill up my inbox. Don't be shy send as many as you would like. I would like this blog to be a forum for all of my C.S.A members. So I would encourage anyone who is thinking about becoming a member please join our blog. If you join the blog you can post & ask me questions. I would gladly offer any advice on veggie farming that I could give. Not an expert by any means but could possible be helpful. Also could be a great place for asking questions about our farm. I am open to any questions. If it is posted on the blog everyone can see it so everyone benefits. Thz Chris


Crispy Baked Zucchini Fries


A fun way to serve zucchini - as crispy zucchini fries!

Ingredients

  • 1/4 cup whole wheat flour
  • 2 eggs
  • 2 cups Panko breadcrumbs
  • Salt
  • Pepper
  • 1/2 tsp garlic powder
  • 1/4 tsp cayenne pepper
  • 1 lb zucchini, cut into 4-5-inch sticks

Instructions

  1. Preheat oven to 425 and line a baking sheet with parchment (or whatever non-stick method you prefer).
  2. Place flour in a large zipper bag.
  3. Whisk eggs with 2 Tbsp water and place in a shallow dish.
  4. Place Panko, salt, pepper, garlic powder, and cayenne pepper in a shallow dish and mix to combine.
  5. Place zucchini in the bag with the flour and shake until well coated. Dip the zucchini into the egg and then into the panko, turning to coat well.
  6. Place breaded zucchini on the baking sheet.
  7. Bake 18-20 minutes, until golden brown.
  8. Serve with your favorite dipping sauce (we like ranch... and barbecue sauce).
  9. They're best the first day, but to store leftovers, store in a single layer on a plate, wrapped with ziploc. Reheat at 375 degrees for 5-7 minutes, until heathed through.

Notes

Yields: 6 servings (8 pieces)
Estimated time: 30 minutes

Sweet Corn: Week 7

Our sweetcorn is not quite done, my neighbor has too much so we worked an agreement out this week. So members who pick up please take 6 ears off the rack. Delivery & Coop will have them packaged in their box. So until our's fills out I hope this helps curb some of the cravings.

Thz Chris

Week 7 C.S.A

These items will be in the box for week seven.

4-5 green peppers (mixed in size)
4-5 Zuc's
4-5 Slicing Cucumbers
1-2 Burpless Cucumbers
1 head of cabbage
1 handful of Jalapeno peppers
1 handful of banana peppers
1lb of green beans

I hope you enjoy. Please wash all produce as soon as you receive items and store accordingly.

Thz Chris

Green Bean Recipe Suggestion!


Green Bean Casserole


Ingredients

  • 1/3 stick butter
  • 1/2 cup diced onions
  • 1/2 cup sliced fresh mushrooms
  • 2 cups sliced green beans
  • 3 cups chicken broth
  • 1 (10 3/4-ounce) can cream of mushroom soup
  • 1 (2.8-ounce) can French-fried onion rings
  • Pinch House Seasoning, recipe follows
  • 1 cup grated Cheddar

Directions

Preheat the oven to 350 degrees F.
Melt the butter in a large skillet. Saute the onions and mushrooms in the butter. Boil green beans in chicken broth for 10 minutes and drain. Add the green beans, mushroom soup, onion rings, and House Seasoning, to taste, to the onion mixture. Stir well. Pour into a greased 1 1/2-quart baking dish. Bake for 20 minutes, then top the casserole with the Cheddar and bake for 10 minutes longer, or until the casserole is hot and cheese is melted.

House Seasoning:

1 cup salt
1/4 cup black pepper
1/4 cup garlic powder
Mix ingredients together and store in an airtight container for up to 6 months.

Cowboy Salsa & Zuc Casserole

This one is a favorite- I add all colors of the peppers I can find!  This is always a favorite at a party!

Cowboy Salsa
1 can whole kernel corn - drained
1 can black beans - drained
1 can black-eyed peas - drained

2 stalks of celery - chopped
1 green pepper - chopped
1 red pepper - chopped
6-8 scallions - chopped
1/2 red onion - chopped

Dressing
1/2 C canola oil
1/2 C sugar
1/2 C cider vinegar
1/2 tsp salt
1/4 tsp pepper

Bring to boil, chill and pour over other ingredients, better after it sits for a while.
Use chips for dipping or put on hamburgers


Zucchini Casserole

3 C diced zucchini- do NOT peel
1/2 C bisquick
Coat zucchini with bisquick and set aside

In another bowl-
3 beaten eggs
1/2 C chopped Velveeta cheese (can use shredded cheddar, but Velveeta is better)
1/4 C oil
1/2 tsp garlic salt
pepper

Spray 8 X 8 baking dish and put in zucchini then pour egg mix over and bake @ 350 degrees for 45 minutes till lightly browned


Thanks for submitting yet another great recipe suggestion. This is great! Thanks Again Chris 

Tuesday, July 19, 2011

Tomatillo Recipe Suggestions:)

This might be worth trying:)

Recipes
Corn & Tomatillo Soup
Makes 8 servings
Each serving equals 1 cup of fruit or vegetables
Ingredients
1½ cup tomatillos
1½ cup onion, chopped
2 garlic gloves, diced
1 tsp margarine
3¾ cup whole kernel corn
1 cup frozen peas
4 cups low sodium chicken broth
1 Tbsp cilantro, chopped
4 oz diced green chilies
¼ cup spinach, chopped
1 tsp sugar
Sautè tomatillos, onion and garlic in with margarine for five minutes. Remove to food processor and add peas and cilantro. Puree to chunky. Pour in pan and add chicken stock, diced green chilies, chopped spinach, corn, and sugar. Heat and serve.
Nutritional analysis per serving: Calories 128, Protein 5g, Fat 2g, Calories From Fat 14%, Cholesterol 2mg, Carbohydrates 25g, Fiber 4g, Sodium 113mg.

What is a Tomatillo?

Photo of tomatillos

Pictured above is a tomatillo


Tomatillos are small fruits (used as a vegetable) enclosed in a husk. The fruit resembles a small unripe tomato and is usually green or yellow. The yellow color indicates ripeness, but tomatillos are most often used when they are still green. Green tomatillos are firmer and easier to slice. The husk that holds the fruit is paper-like and is light brown. The flesh is slightly acidic with a hint of lemon. Tomatillos belong to the same family as tomatoes.
The Aztecs first grew tomatillos as far back as 800 B.C. and they have been popular in Mexico and other Latin American countries for many years. In the US, they are mainly grown in Texas.

Storage
Fresh tomatillos with the husk still intact may be stored in the refrigerator for up to two weeks. They are best stored in a paper bag. Tomatillos last a week longer in the refrigerator if the husks are removed and the fruit is placed in sealed plastic bags. Tomatillos may also be frozen after removing the husks.

Preparation
Photo of tomatillosThe husks must be removed before preparing, but tomatillos in the husk are often used as decoration. Wash the fruit with soap and water to remove the film left by the husk. Tomatillos may be used raw in salsas or salads or cooked for sauces. Cooking enhances the flavor and softens its skin, but the result is a soupy consistency since the fruit collapses after a few minutes.


Monday, July 18, 2011

Member Submitted Comment:)

Chris, you guys are doing a great job.  As I mentioned today, we have been in CSA's for the past few years and have enjoyed them but NOTHING compared to what you guys are bringing to the "table"!  Everything is delicious and the organization, the variety and everyone's kindness is sooo appreciated (especially to our kids)!   ALSO- the herb bed- amazing!  Thanks again Chris and crew:) for ALL do you!   Mark/Tammy D

Blue Cheese-Walnut Green Beans

blue cheese-walnut green beans


Ingredients
U.S.MetricConversion chart
  • 1 pound(s) green beans, trimmed
  • 1/4 cup(s) water
  • 2 teaspoon(s) extra-virgin olive oil
  • 1/4 teaspoon(s) salt
  • 1/4 teaspoon(s) freshly ground pepper
  • 1/3 cup(s) crumbled blue cheese
  • 1/3 cup(s) toasted chopped walnuts (see Tips & Techniques)

Directions
  1. Bring green beans and water to a boil in a large skillet. Reduce heat to a simmer, cover, and cook until the beans are just tender, 3 minutes. Uncover and continue cooking, stirring occasionally, until the water has evaporated, 3 to 4 minutes more.
  2. Add oil, salt, and pepper to the pan and cook, stirring, 1 minute more. Transfer the beans to a large bowl and toss with blue cheese until well coated. Sprinkle each serving with walnuts.

    Carb Servings: 1 vegetable, 1/2 high-fat meat, 2 fat. Carbohydrate Servings: 1/2. Nutrition Bonus: Vitamin C (20% daily value), Vitamin A (15% dv).

Tips & Techniques
To toast chopped or sliced nuts, stir constantly in a small dry skillet over medium-low heat until fragrant and lightly browned, 2 to 4 minutes.

Green Pepper & Tomato Salad

Picture of Green Pepper and Tomato Salad RecipePhoto: Green Pepper and Tomato Salad Recipe

Ingredients

  • 2 green bell peppers, seeded and cut into 1 1/2-inch dice
  • 3 vine-ripe tomatoes, seeded and diced
  • 1 small onion, chopped
  • 1 large clove garlic, finely chopped
  • 1/2 cup flat-leaf parsley leaves, coarsely chopped
  • 1/2 lemon, juiced (1 tablespoon)
  • 1 tablespoon red wine vinegar
  • 3 tablespoons extra-virgin olive oil
  • Coarse salt and black pepper
  • 1 teaspoon ground cumin, 1/2 a palm full

Directions

Combine peppers, tomatoes, onions, garlic, parsley in a bowl with your fingertips. Squeeze the juice of the lemon with the lemon half sitting upright. This will help prevent the seeds from falling into the bowl. The lemon juice will spill down over the sides of the lemonand the seeds will remain with the fruit. Squeeze the juice evenly over the salad. If the lemon is under-ripe, microwave it for 10 seconds before you cut into it. Next, sprinkle a tablespoon ofvinegar over the salad -- just eyeball it. Drizzle the extra-virgin olive oil over the salad, add the salt, pepper and cumin. Toss again. Taste to adjust seasonings and serve.

Stuffed Pepper!

Stuffed Green Peppers I Recipe


Prep Time:
30 Min
Cook Time:
30 Min
Ready In:
1 Hr


Ingredients

  • 6 green bell peppers
  • salt to taste
  • 1 pound ground beef
  • 1/3 cup chopped onion
  • salt and pepper to taste
  • 1 (14.5 ounce) can whole peeled tomatoes, chopped
  • 1 teaspoon Worcestershire sauce
  • 1/2 cup uncooked rice
  • 1/2 cup water
  • 1 cup shredded Cheddar cheese
  • 2 (10.75 ounce) cans condensed tomato soup
  • water as needed

Directions

  1. Bring a large pot of salted water to a boil. Cut the tops off the peppers, and remove the seeds. Cook peppers in boiling water for 5 minutes; drain. Sprinkle salt inside each pepper, and set aside.
  2. In a large skillet, saute beef and onions for 5 minutes, or until beef is browned. Drain off excess fat, and season with salt and pepper. Stir in the tomatoes, rice, 1/2 cup water and Worcestershire sauce. Cover, and simmer for 15 minutes, or until rice is tender. Remove from heat, and stir in the cheese.
  3. Preheat the oven to 350 degrees F. (175 degrees C). Stuff each pepper with the beef and rice mixture, and place peppers open side up in a baking dish. In a medium bowl, combine tomato soup with just enough water to make the soup a gravy consistency. Pour over the peppers.
  4. Bake covered for 25 to 35 minutes, until heated through and cheese is melted and bubbly.

Nutritional Information open nutritional information

Amount Per Serving  Calories: 463 | Total Fat: 24.3g | Cholesterol: 89mg

Related Posts Plugin for WordPress, Blogger...